
How to Configure Interview Audio in Blackmagic Camera on iPhone
Configure the iPhone microphone, audio format and sample rate in Blackmagic Camera before testing an interview recording.
Open Blackmagic Camera
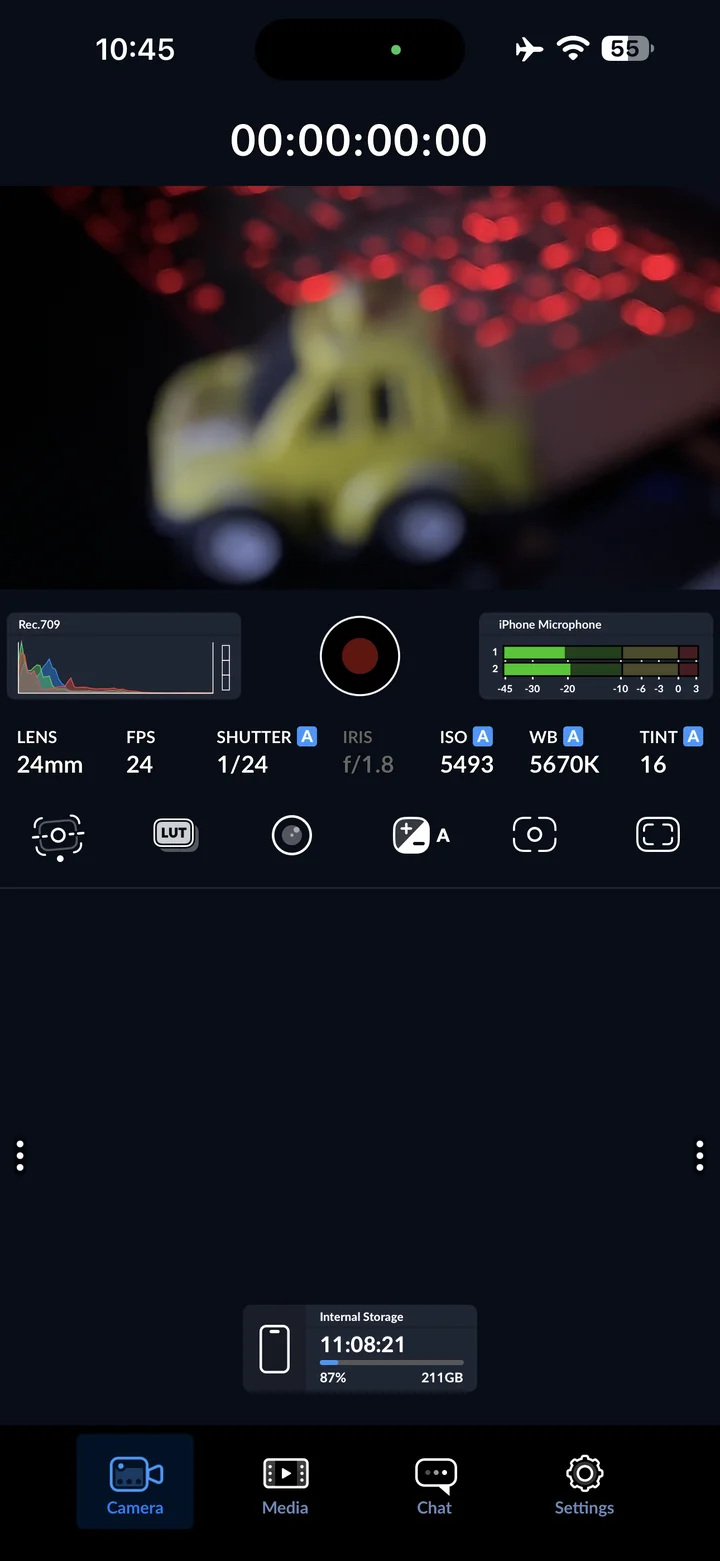
Before you begin: Blackmagic Camera for iOS. Screenshots: version 3.5.20 on iPhone 14 Pro Max. Start from your preferred baseline; changing these settings affects subsequent recordings.
Open Blackmagic Camera on your iPhone. Start in the Camera view. This walkthrough uses version 3.5.20 on an iPhone 14 Pro Max; available formats may differ on other devices.
Open camera settings
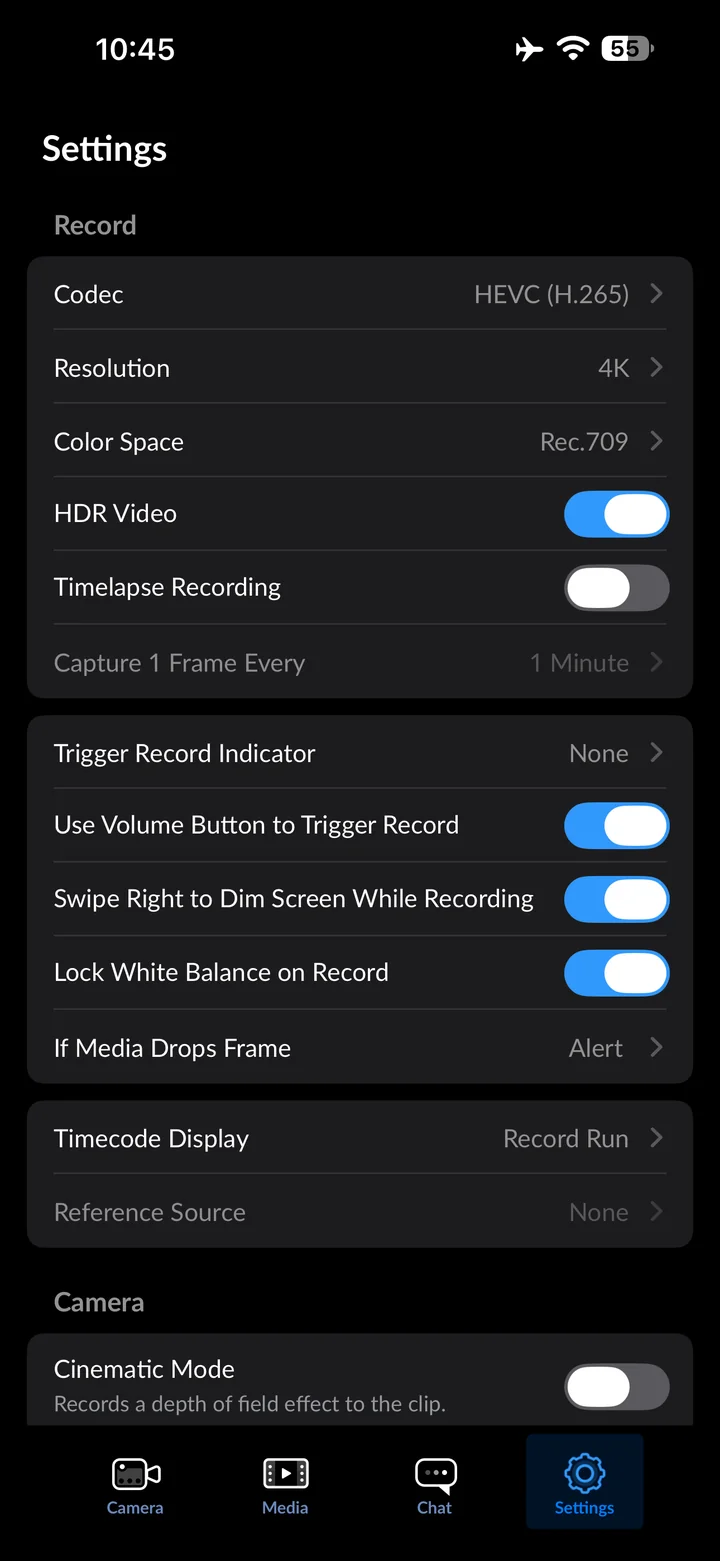
Tap Settings at the bottom. The recording, camera, audio and monitoring settings appear in this scrollable list.
Open Audio Source
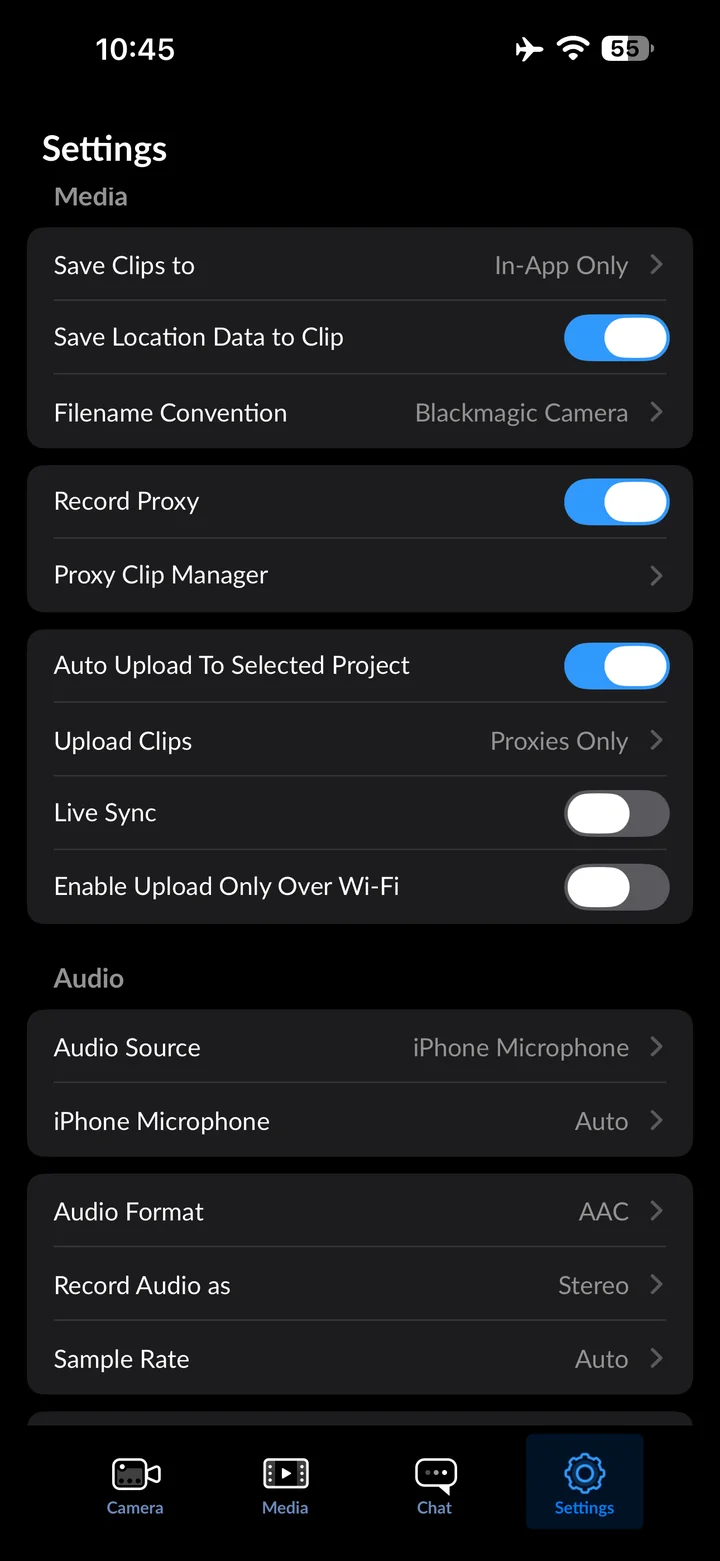
In Settings, tap Audio Source.
Set Audio Source to iPhone Microphone
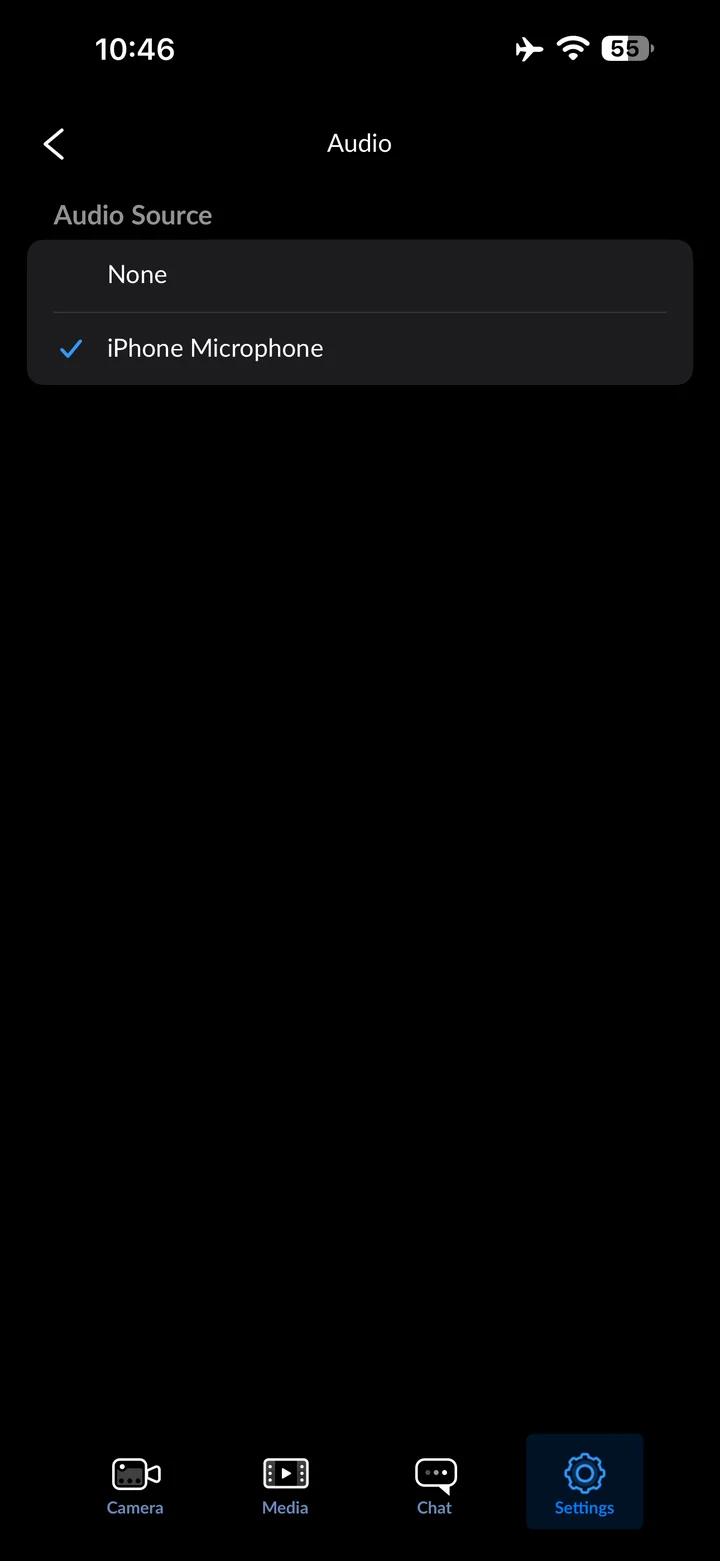
Select the iPhone microphone for this example. An external microphone requires its own source selection and connection check.
Open Audio Format
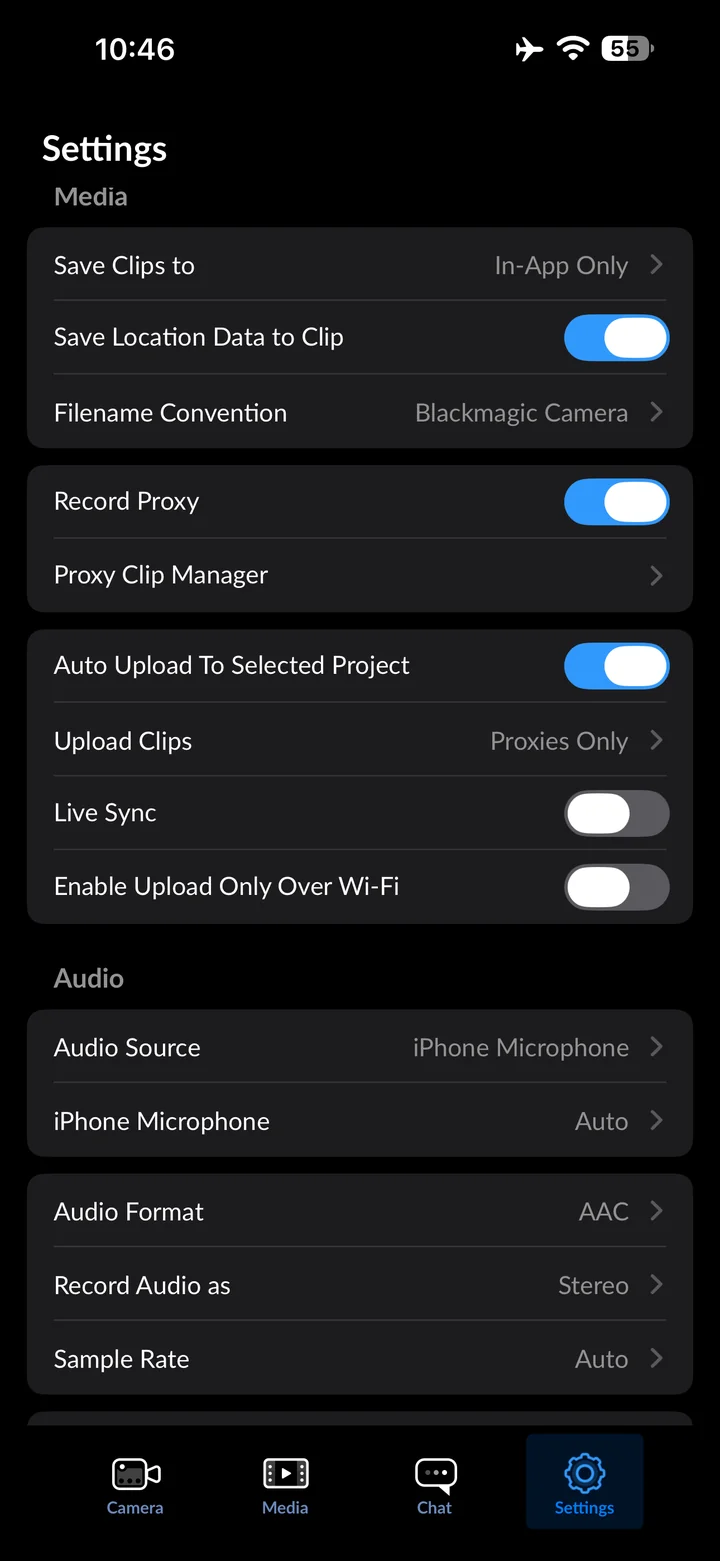
In Settings, tap Audio Format.
Set Audio Format to Linear PCM
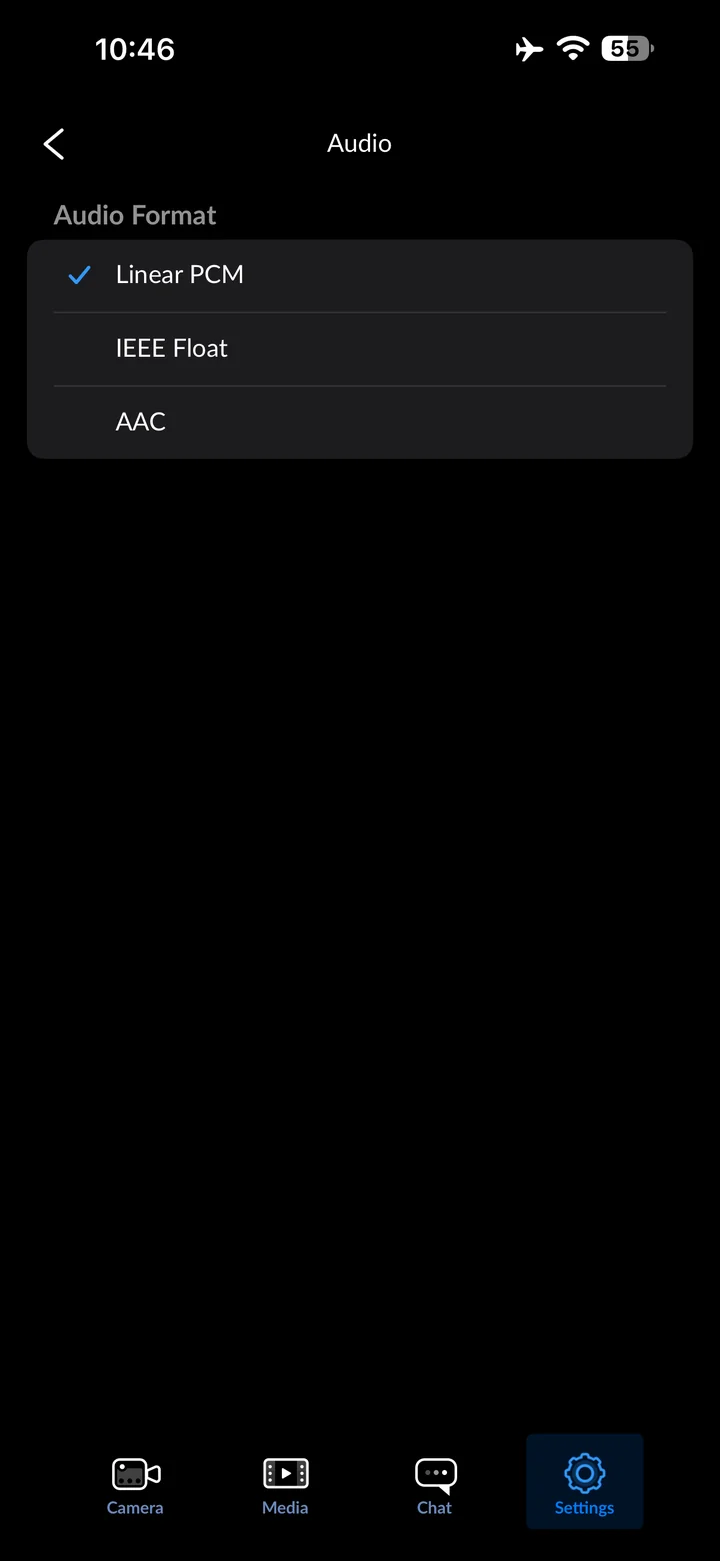
Choose Linear PCM for this audio workflow. Check compatibility with your editing software.
Open Sample Rate
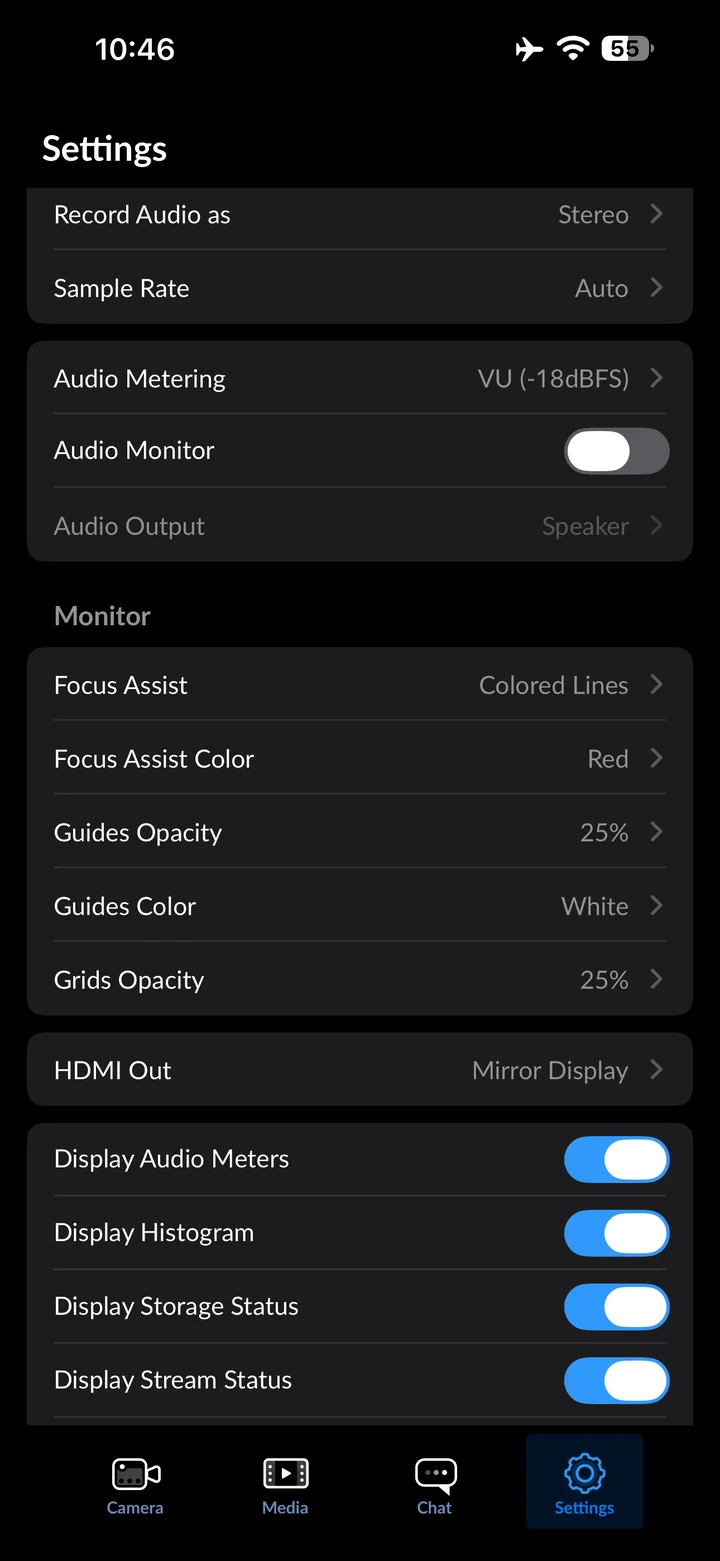
In Settings, tap Sample Rate.
Set Sample Rate to 48.0 kHz
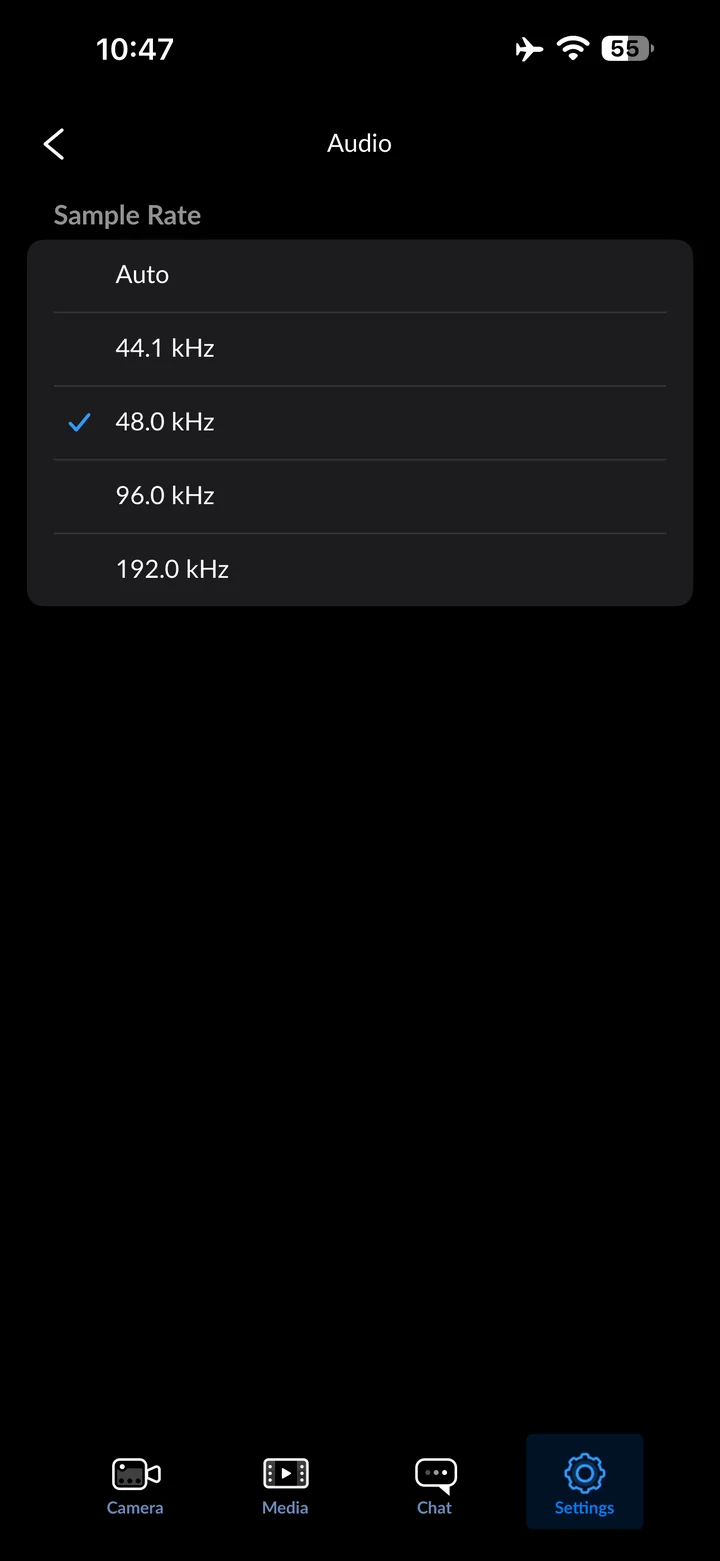
Choose 48 kHz. Before an interview, make a short test and listen for noise, distortion and the speaker’s distance from the microphone.
Check the camera before recording
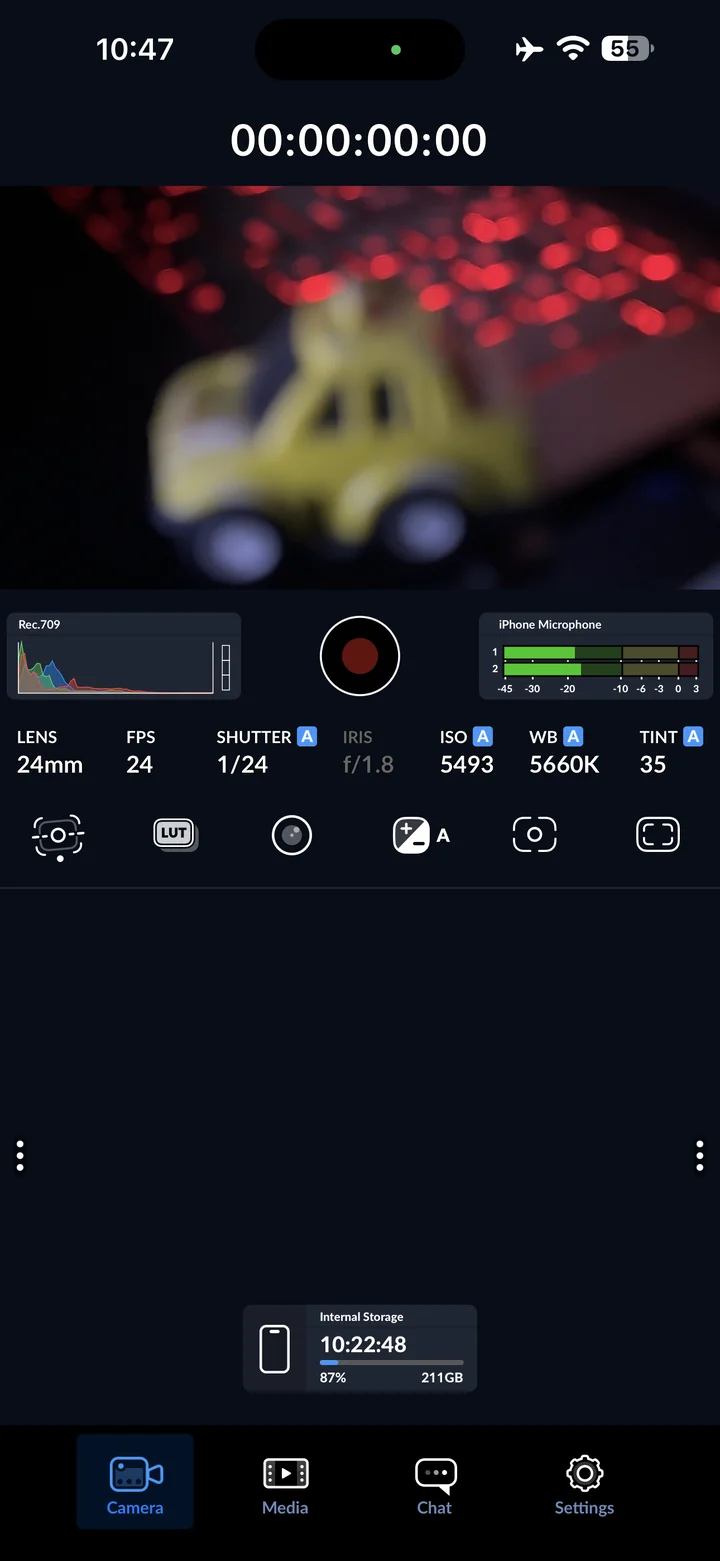
Return to Camera and check your framing, lighting and sound before recording. The screenshots demonstrate settings; they do not include a recorded clip.
Reference
By ProgramGuru
Published: 2026-10-14
Updated: 2026-10-14
Instructions reviewed against Apple documentation on 2026-10-14.